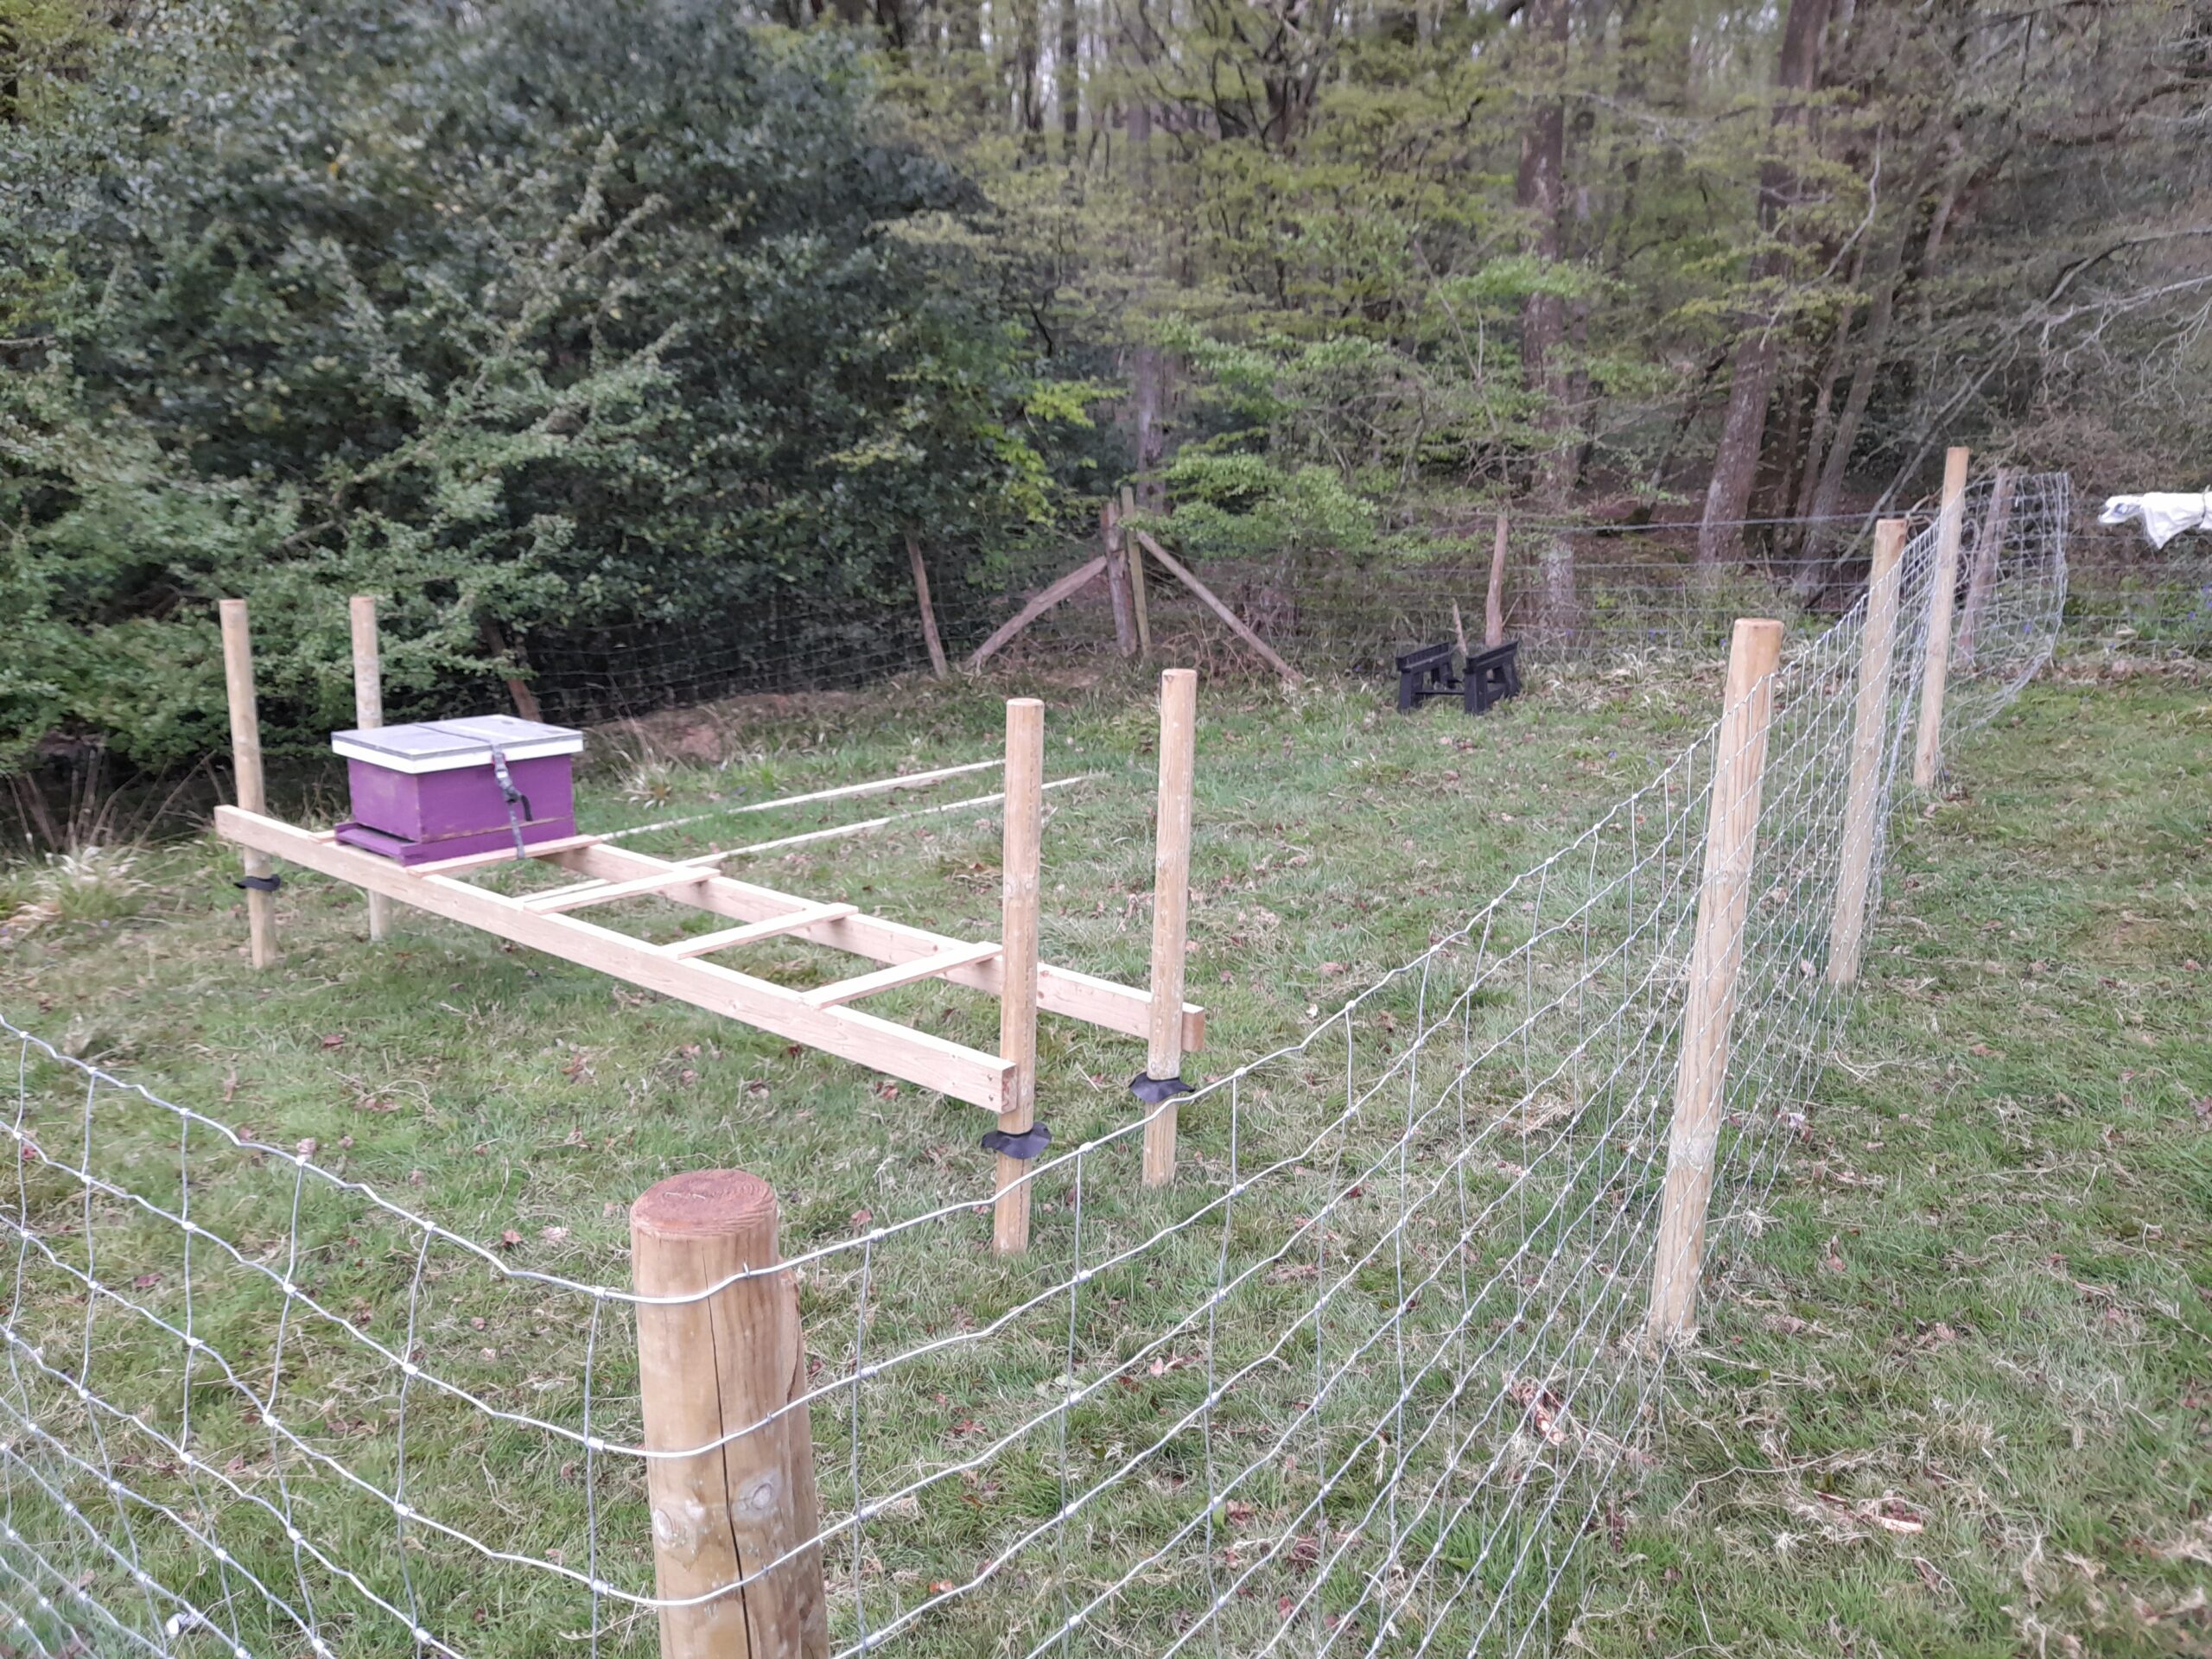
Hive stands can take many forms and range from a simple paving slab or pallet to an elaborate all sing in all dancing construction. Ideally the hives should be a short distance off the ground so as not to hurt your back loading things on top, though be careful as if you are running lots of supers you could end up with a high structure. Stands should be stable and safe and ideally allow for the tying down of the hives in case of wind this is especially important with Poly Hives as they are light weight and susceptible to winds.
I have used many different stands in my time as a beekeeper but my favourite construction at the moment is the twin parallel beams. This is especially good when working on non-uniform flat grassland, such as a field. The stand consists of 4 posts and 2 long beams. It is quite hard to get the posts in the exact right place but well worth it if you are in a field and want something quick easy and relatively cheap. I use 75 mm rounded posts and 2×3 or 2×4 lengths of wood (3.6 M long) for the beams. Some good long screws hold it all together and it is remarkably sturdy when in place. Cross supports allow for the partitioning for individual hives and nucs. They also add stability to the structure and allow the hives to be tied down.

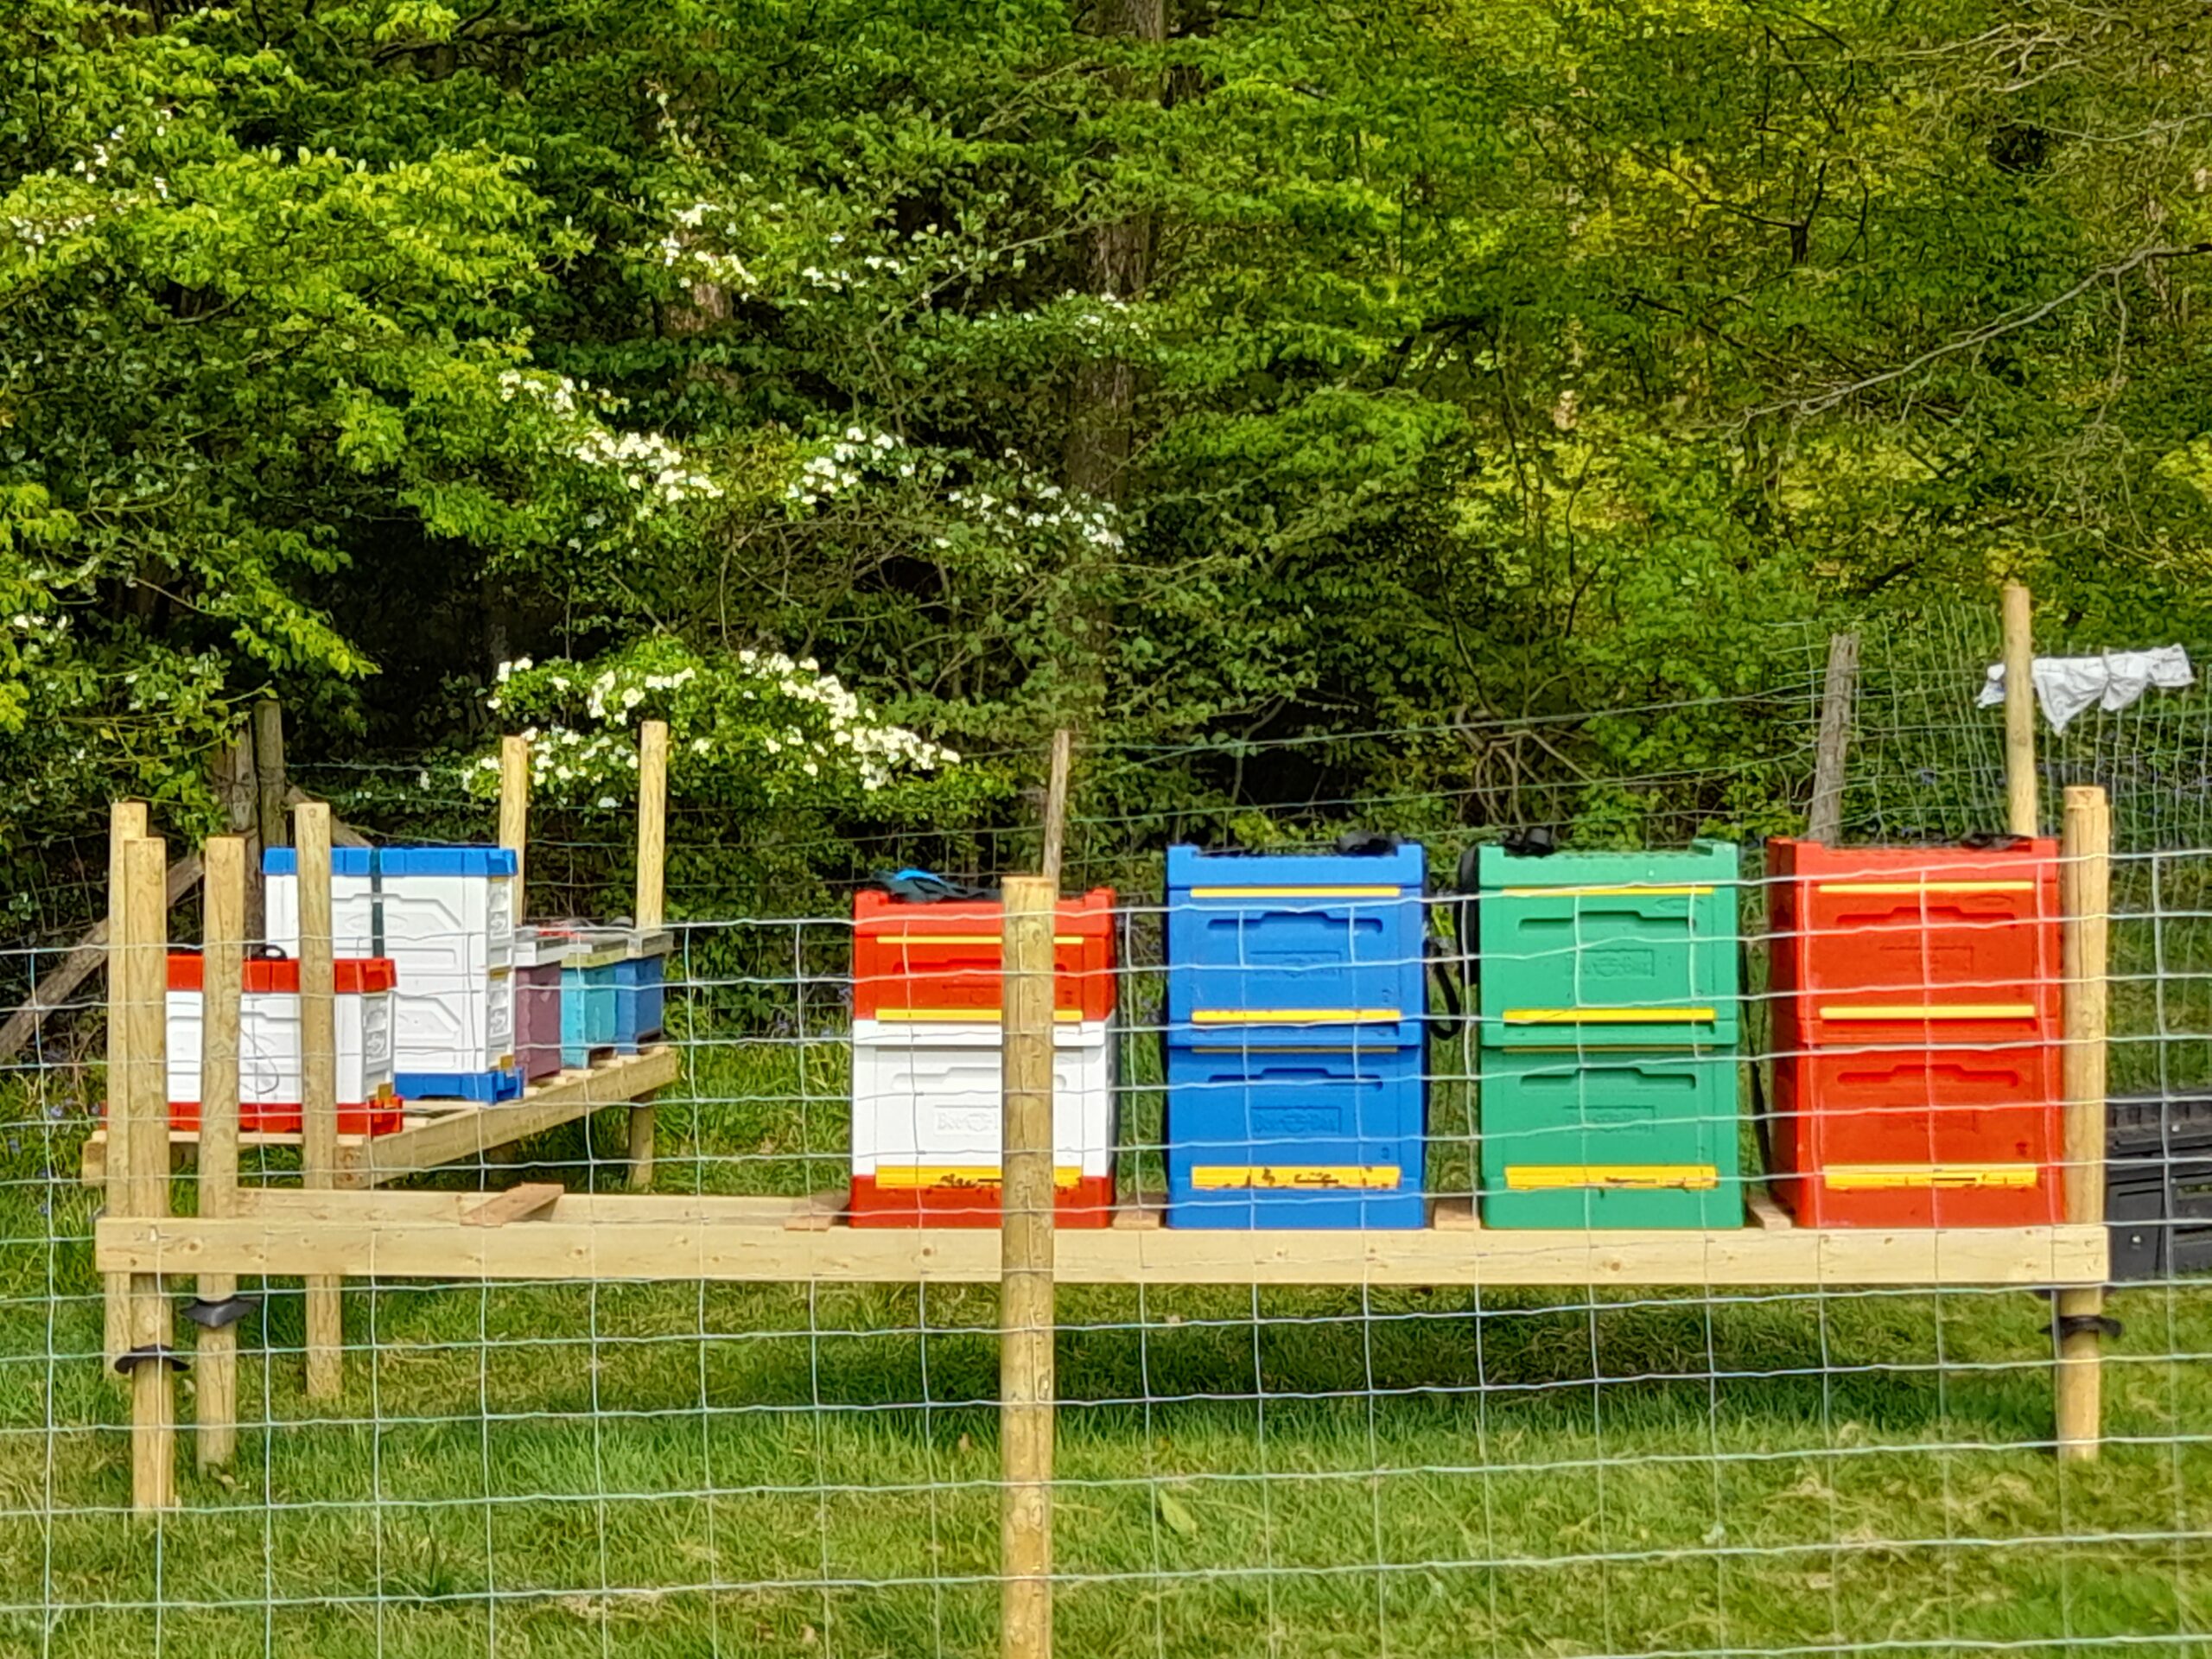
Here is my Apiary with he first of two stands that takes 6 full hives. The rings of rubber that fit onto the legs to prevent pests from climbing up the legs of the hive stands. These rubber flaps prevent ants from gaining possession of the top level. They are cut from old rubber sheet that I had left over from another project and are 10 cm wider than the pole. To create the cone the inner hole is 1 cm less than the diameter of the pole. They do unfortunately have to be put on before the beams are screwed into place.
Start with a 2 posts in the correct line, decide the desired height and fix the first beam at the desired height with a single screw. Level the beam correctly using a spirit level and attach to the other post. The tricky part is now securing the third post in the exact right place and fixing the third corner so that it is exactly level with the first beam. A bit of string with 2 loops will help to guide the third and fourth post into the correct place the right distance from the first beam, and securing the beam loosely onto post 4 with a single screw at the approximate correct height will aid in getting the positioning on post 3 correct before levelling in both directions and securing on post 4. Adding the second screw on each of the joints will add in the stability as will the cross bars for support between the desired hive locations.
I personally wouldn’t make these any longer as this puts more weight and more risk on my hives (6 hives per stand is quite enough) but would also consider using 6 posts rather than just the 4. I have in the past used thinner 50 mm posts but these become lack stability. The 60 mm posts are perfect for the job, bashed a good distance into the ground.Regularly check the stand for levelness in case the ground moves under the posts.

I currently have 2 of these stands at right angles with the capacity for 12 hives facing outwards. I have left room to level the tops of the posts and add a further layer of 4×2 beams to add a layer of nucs in the future which is something that I may consider if I expand the nucs side of my beekeeping activities and run out of space.

